DIY Christmas Ball Wreath – Felt Craft
Christmas wreathsare a wonderful way to decorate for the holidays. One of the best features of wreaths is that they are so individual, so unique, so different! Sure, the shape is (generally) a circle, but above and beyond that,Christmas wreathstake any number of forms.
 View in gallery
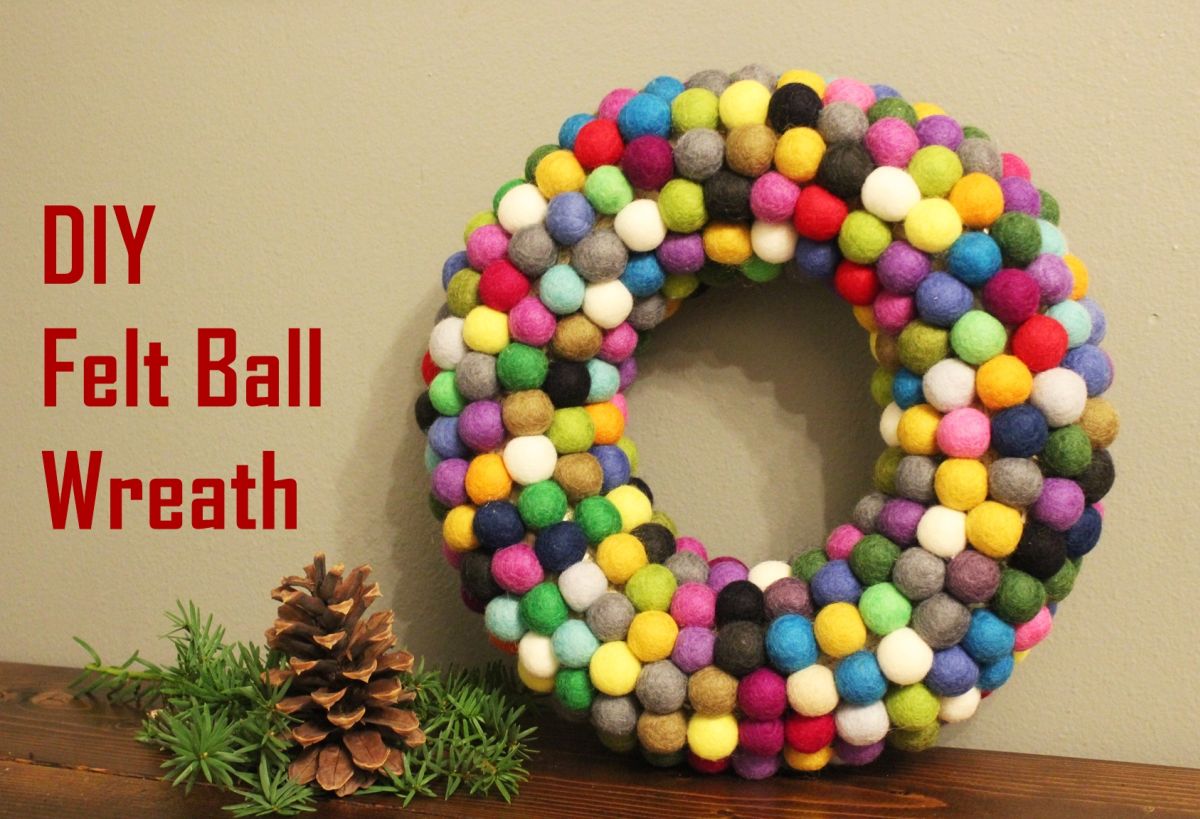
This DIY felt ball wreath is a favorite this season – its multicolored nature is non-traditional, and the simplicity quite modern. Here’s how to make your own DIY felt ball wreath this holiday season.
 View in gallery
Materials you’ll needed for Christmas Ball Wreath:
- Felt balls (tutorial uses 300 felt balls, approximately 1” in diameter)
- Heavy duty thread
- Large needle
- 12” straw wreath (not shown)
- 热熔胶枪+热胶棒
- Twine for hanging the wreath
Step by step instructions to craft the Christmas Wreath:
 View in gallery
You could actually use any type of thread/string/line that you feel would be strong and “invisible” enough for this project. Because the felt balls are multi-colored, I went with black heavy duty thread.
 View in gallery
Thread the needle with about 8’ of thread (doubled over, the thread line will be about 4’). Tie a double knot at the end of the thread line.
 View in gallery
Selecting felt balls at random, stick the needle through each ball directly through the center.
 View in gallery
Push the felt balls next to each other, but don’t pull the thread taut. You will want a little wiggle room to be able to move the felt balls 1/8” or 1/4″ as needed when you go to attach them to the wreath form.
 View in gallery
When you get about 6” from the eye of your needle, tie off the thread in another double knot. Cut the thread.
 View in gallery
Repeat these steps until you have threaded all of your felt balls. The reason you’re threading them is so that they stay together when it comes time to attach them to the straw wreath. Not only will it go faster to attach them when they’re already strung together, but the felt balls will also stay on the wreath form much better when they’re hooked to their neighbors rather than flying solo.
 View in gallery
Tie twine, string, wire, or whatever you want around the straw wreath before you attach any felt balls to it. Glue the hanging device (e.g., twine) down so it doesn’t pull up on the felt balls when the wreath is hanging up.
 View in gallery
Along the ridge of the back of your wreath, run a generous bead of hot glue about 6” long.
 View in gallery
Set the glue gun aside, and press the felt balls into the straw wreath for about 5-10 seconds before moving onto the next 6” on your felt ball strand.
 View in gallery
Continue circling this back ridge until you’ve covered the entire circumference of the wreath back. You don’t need to glue felt balls onto the back of the wreath, so choose the “ridge” line that’s as far toward the back as possible while still allowing the wreath to lie flat on its back.
 View in gallery
You will likely have some length of your strand left with felt balls on it. You’ll continue this gluing process, placing these felt balls onto the next ring of felt balls, toward the front of your straw wreath.
 View in gallery
Run a generous bead of hot glue about 1/2″ away from the first ring of felt balls. You want to aim so the center of the next ring of felt balls hits the glue while their sides touch the first ring as well.
 View in gallery
Place, then press, the second ring of felt balls. Continue in this way for the entire second ring of felt balls. If you reach the end of a strand of felt balls, simply secure the end felt ball in place and then generously glue the first felt ball right next to it. String should be invisible.
Continue the second ring, then repeat the process for the third ring…and so on until you’ve covered the entire straw wreath’s face.
 View in gallery
When you get to the “top” of the face of the wreath, you may find it easier to lay the straw wreath down flat to attach the felt balls. You will likely have to stand it on its side when you reach the center section of the wreath with the felt ball strands.
 View in gallery
Securely glue down the final felt ball on the back of the wreath. Double check all felt balls to make sure they’re secure. Add glue and press down anywhere that needs additional glue support. Note: Don’t try to glue the felt balls to each other. It doesn’t really work. Only glue them to the straw wreath.
 View in gallery
Your goal is to have the felt balls reach far enough toward the back of your straw wreath that the wreath form isn’t visible around the inside or outside ridges.
 View in gallery
And there you go. A very happy, modern, multi-colored felt ball wreath.
 View in gallery
Of course, you could choose only red, white, and green felt balls if you wanted it specifically Christmas colored. Or whatever colors you like for the holiday season.
 View in gallery
You’ll notice that, if you look hard, you can see the straw wreath between some of the felt balls. Don’t worry about this too much; when the wreath is completed, that will become a negligible detail.
 View in gallery
If your Christmas season is half as endearing as this DIY felt ball wreath is, you’re going to have a wonderful holiday.
Merry Christmas.