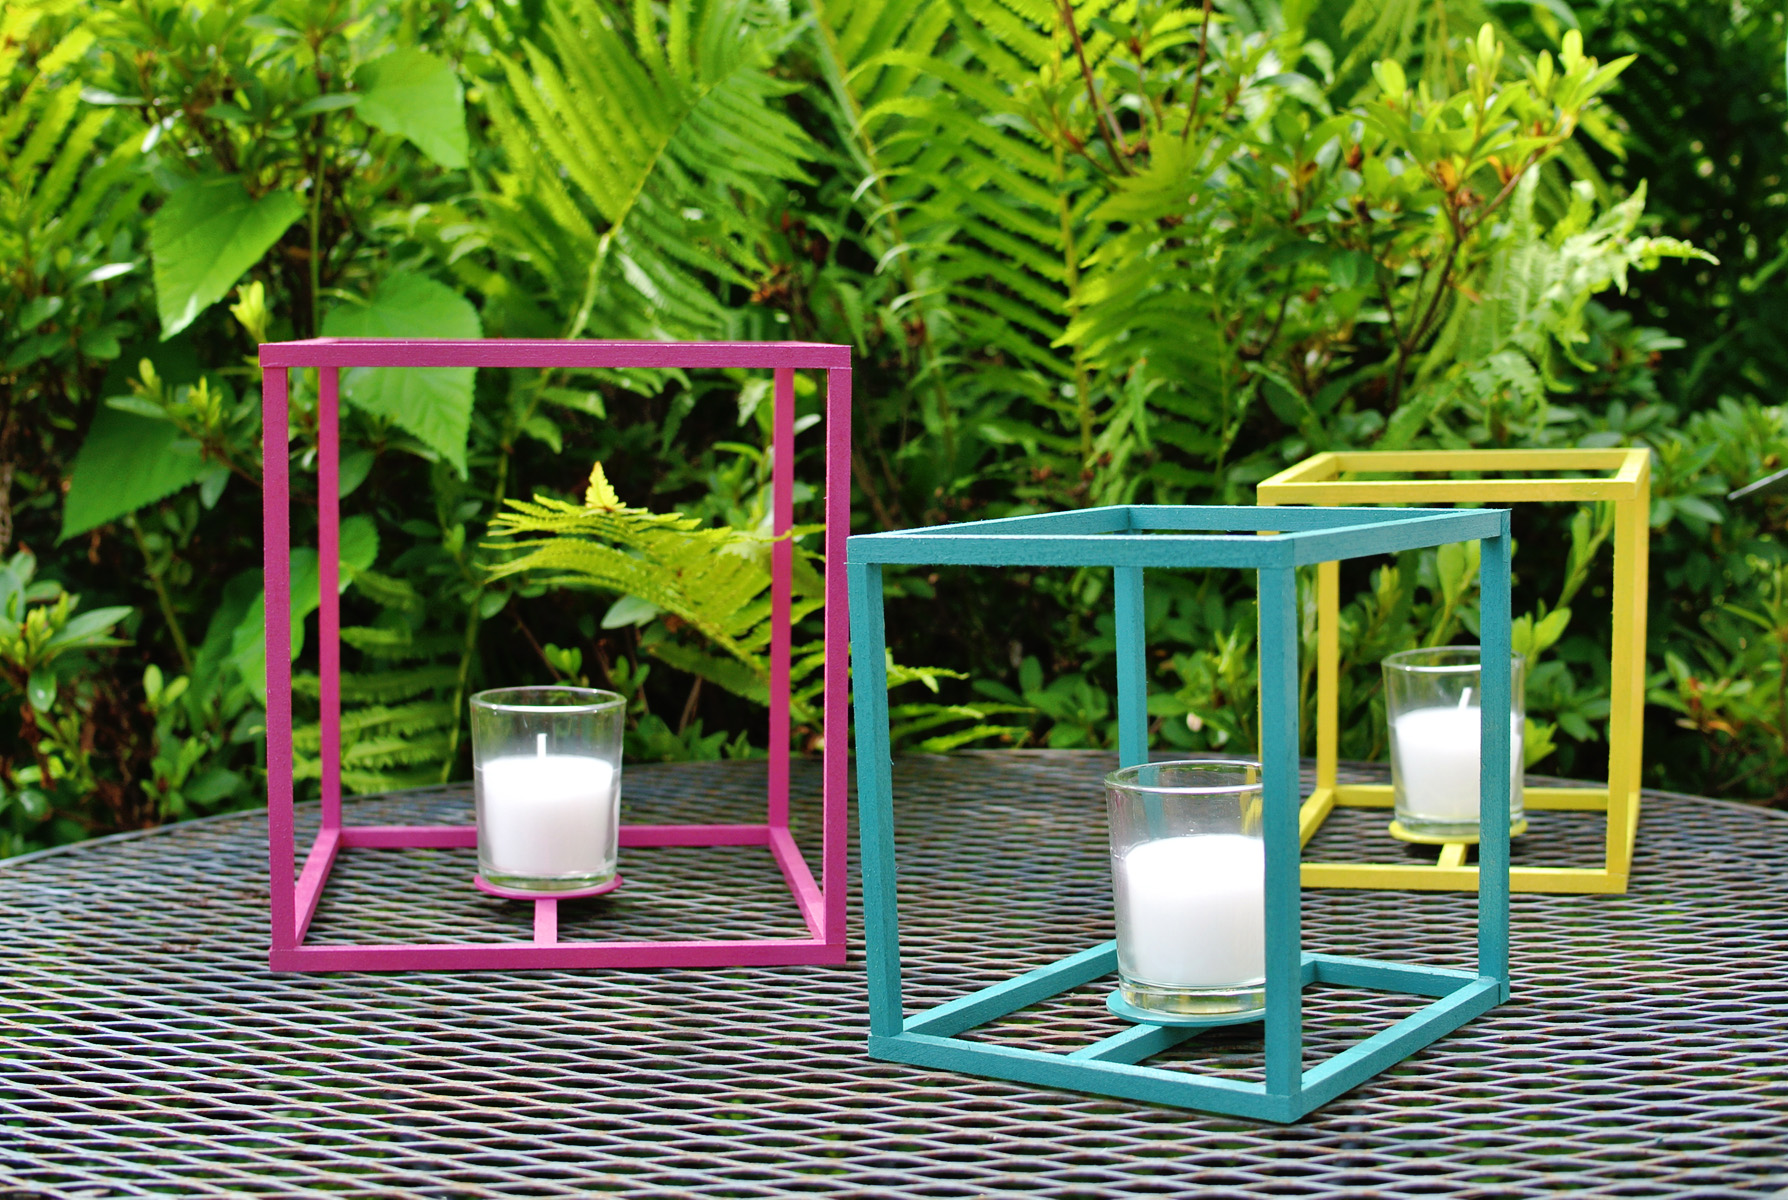
DIY Cubed Outdoor Candle Lanterns
Summertime means time outdoors with friends and family. Brighten up your exterior living space with these colorful and funDIY outdoor candle lanternsthat will be great accessories for even the smallest of spaces.
 View in gallery
供应自助户外蜡烛灯笼(2small and one large cube):
- 15 18″ square dowel rods available at your local craft store
- pen
- tape measure
- saw (handsaw, miter saw or table saw)
- spray paint
- 3 large washers (for the center candle)
- 3 candles
- superglue (and an accelerator such as kicker to speed up drying if desired)
 View in gallery
DIY Cubed Outdoor Candle Lanterns Instructions:
Step 1: Measure and cut dowel rods
Start by measuring out the dowel rods that will be used to create the cubes in whatever size you desire. Here we created two 4″ cubes and one 6.5″ cube. For each cube you will need 13 of the same sized pieces no matter what size you create. It is easiest to cut them all at the same time if possible so that the measurements are as close as possible.
 View in gallery
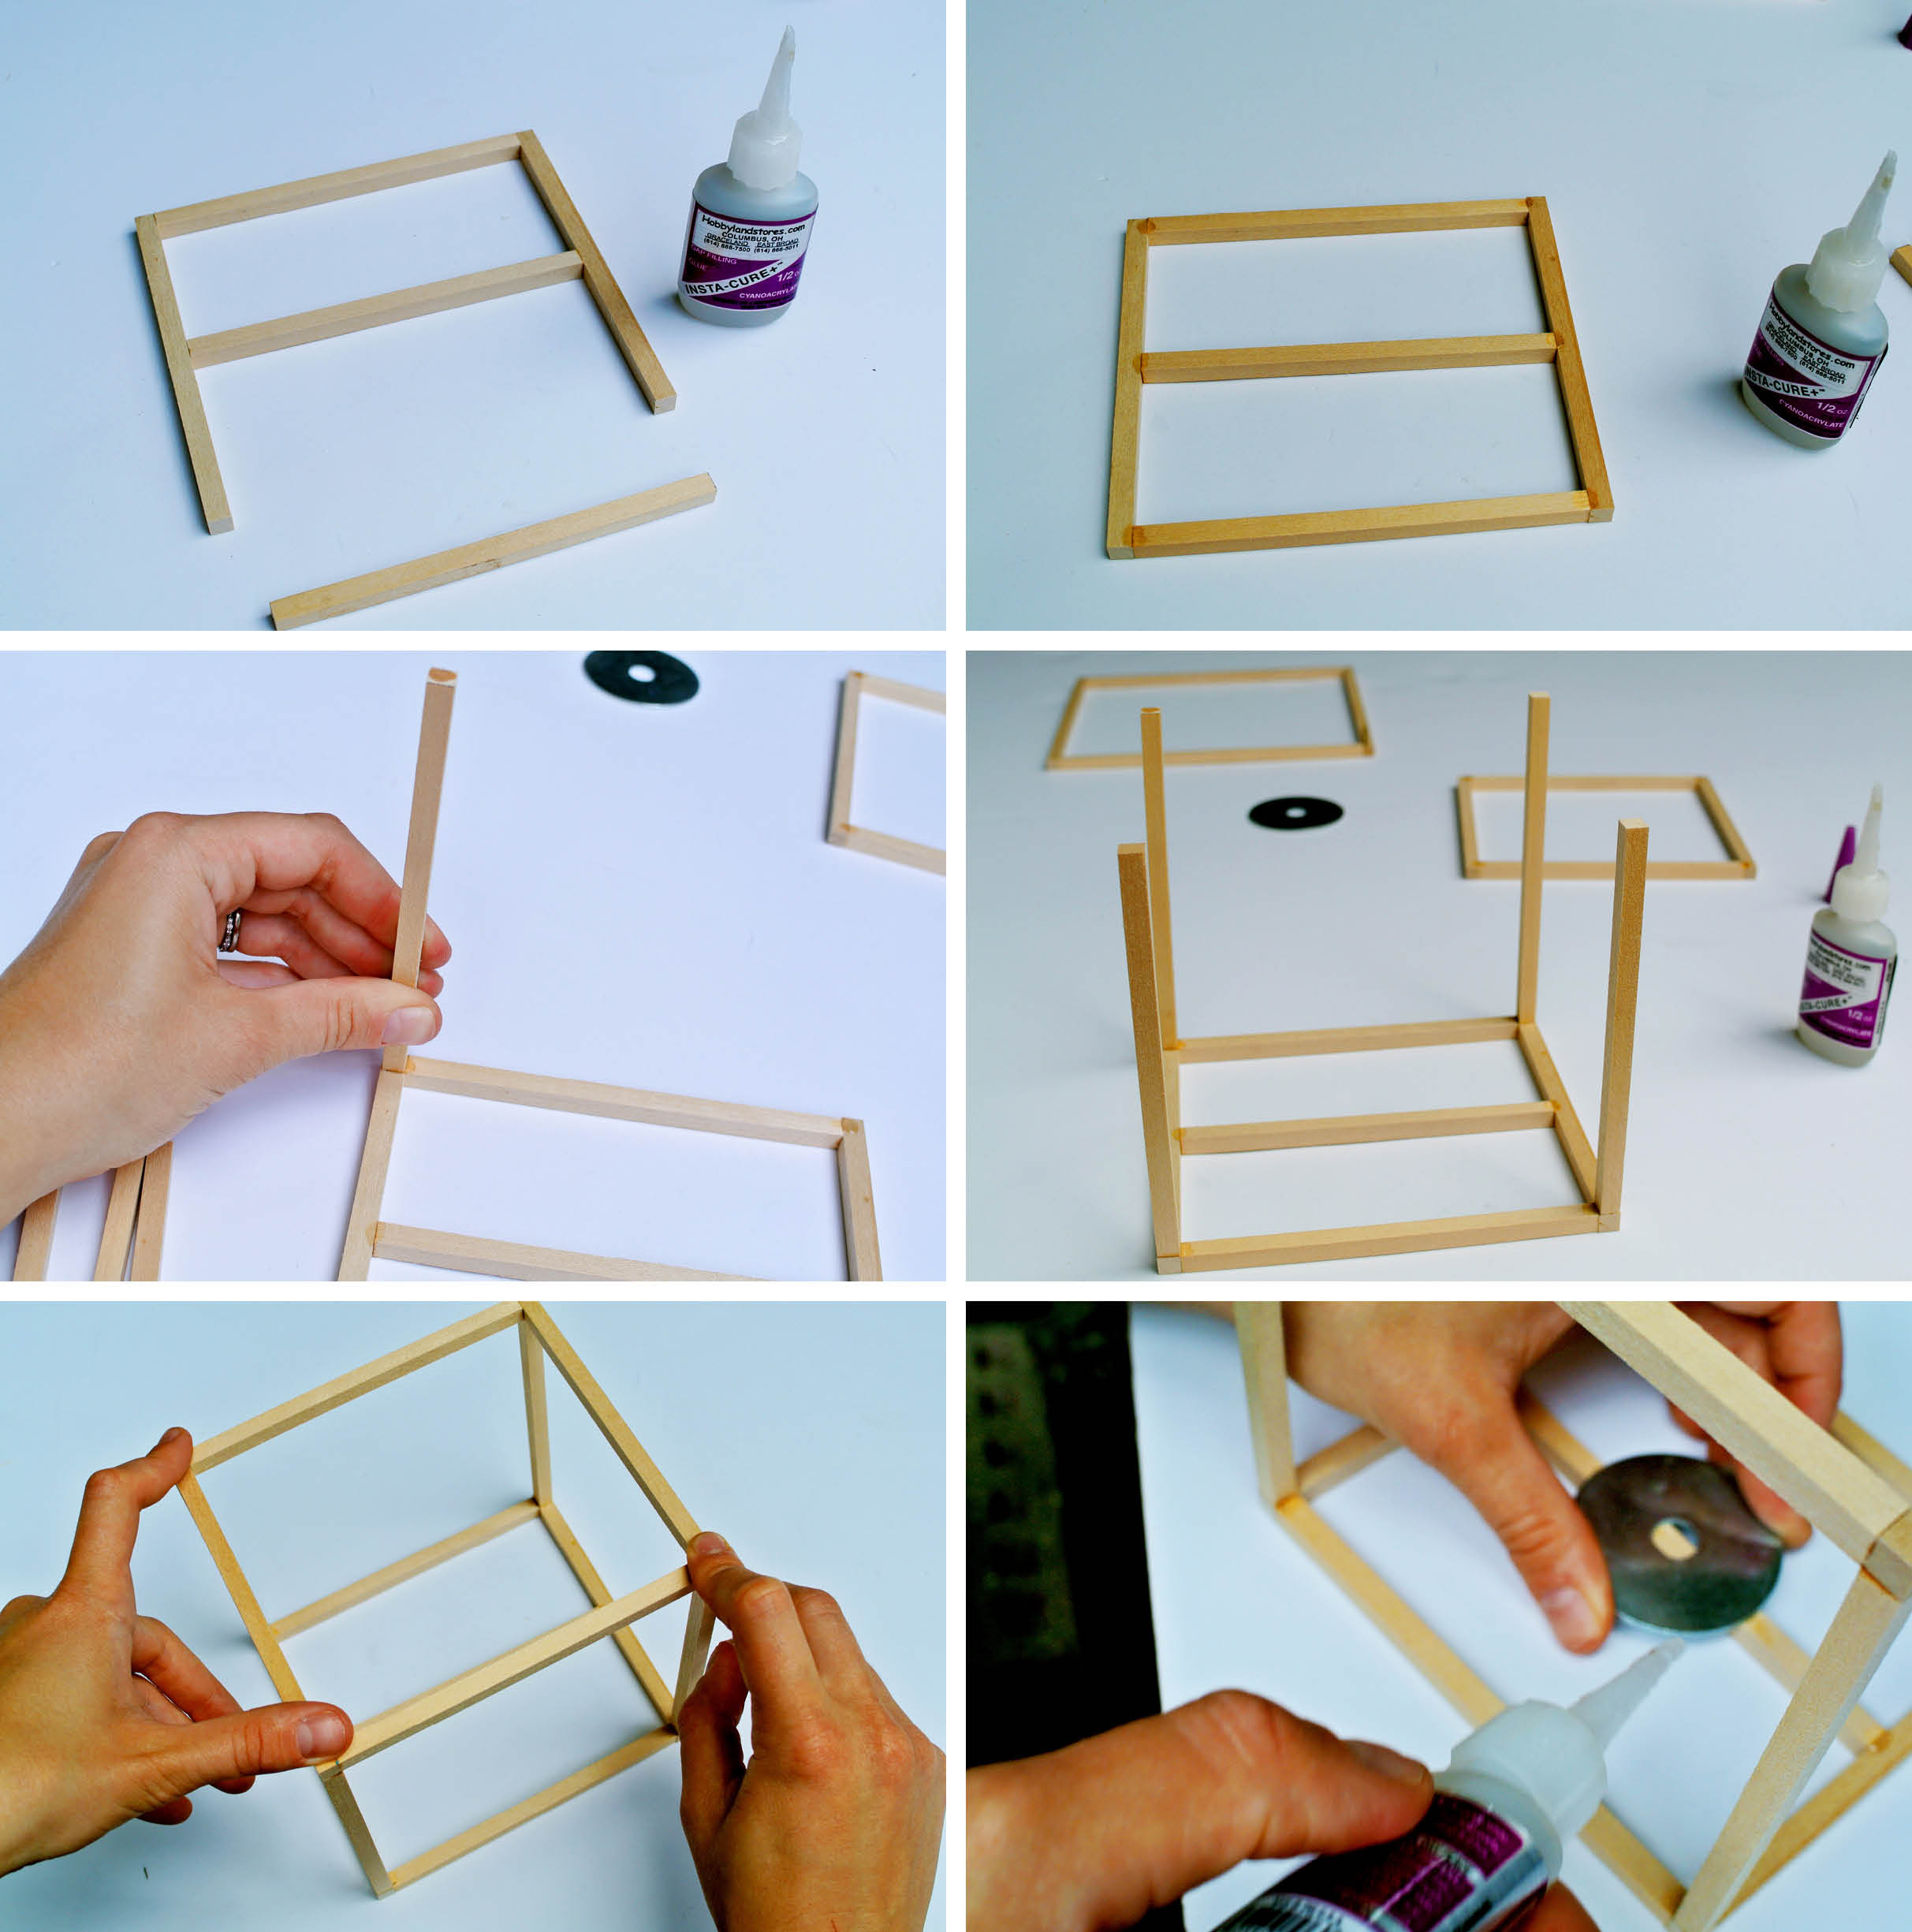
Step 2: Start to glue pieces together
Layout all your pieces before starting to glue. Create one box for the top with 4 pieces, another box for the bottom with 4 more pieces, and one extra to go across the center. Set 4 more aside to create the height of the box.
 View in gallery
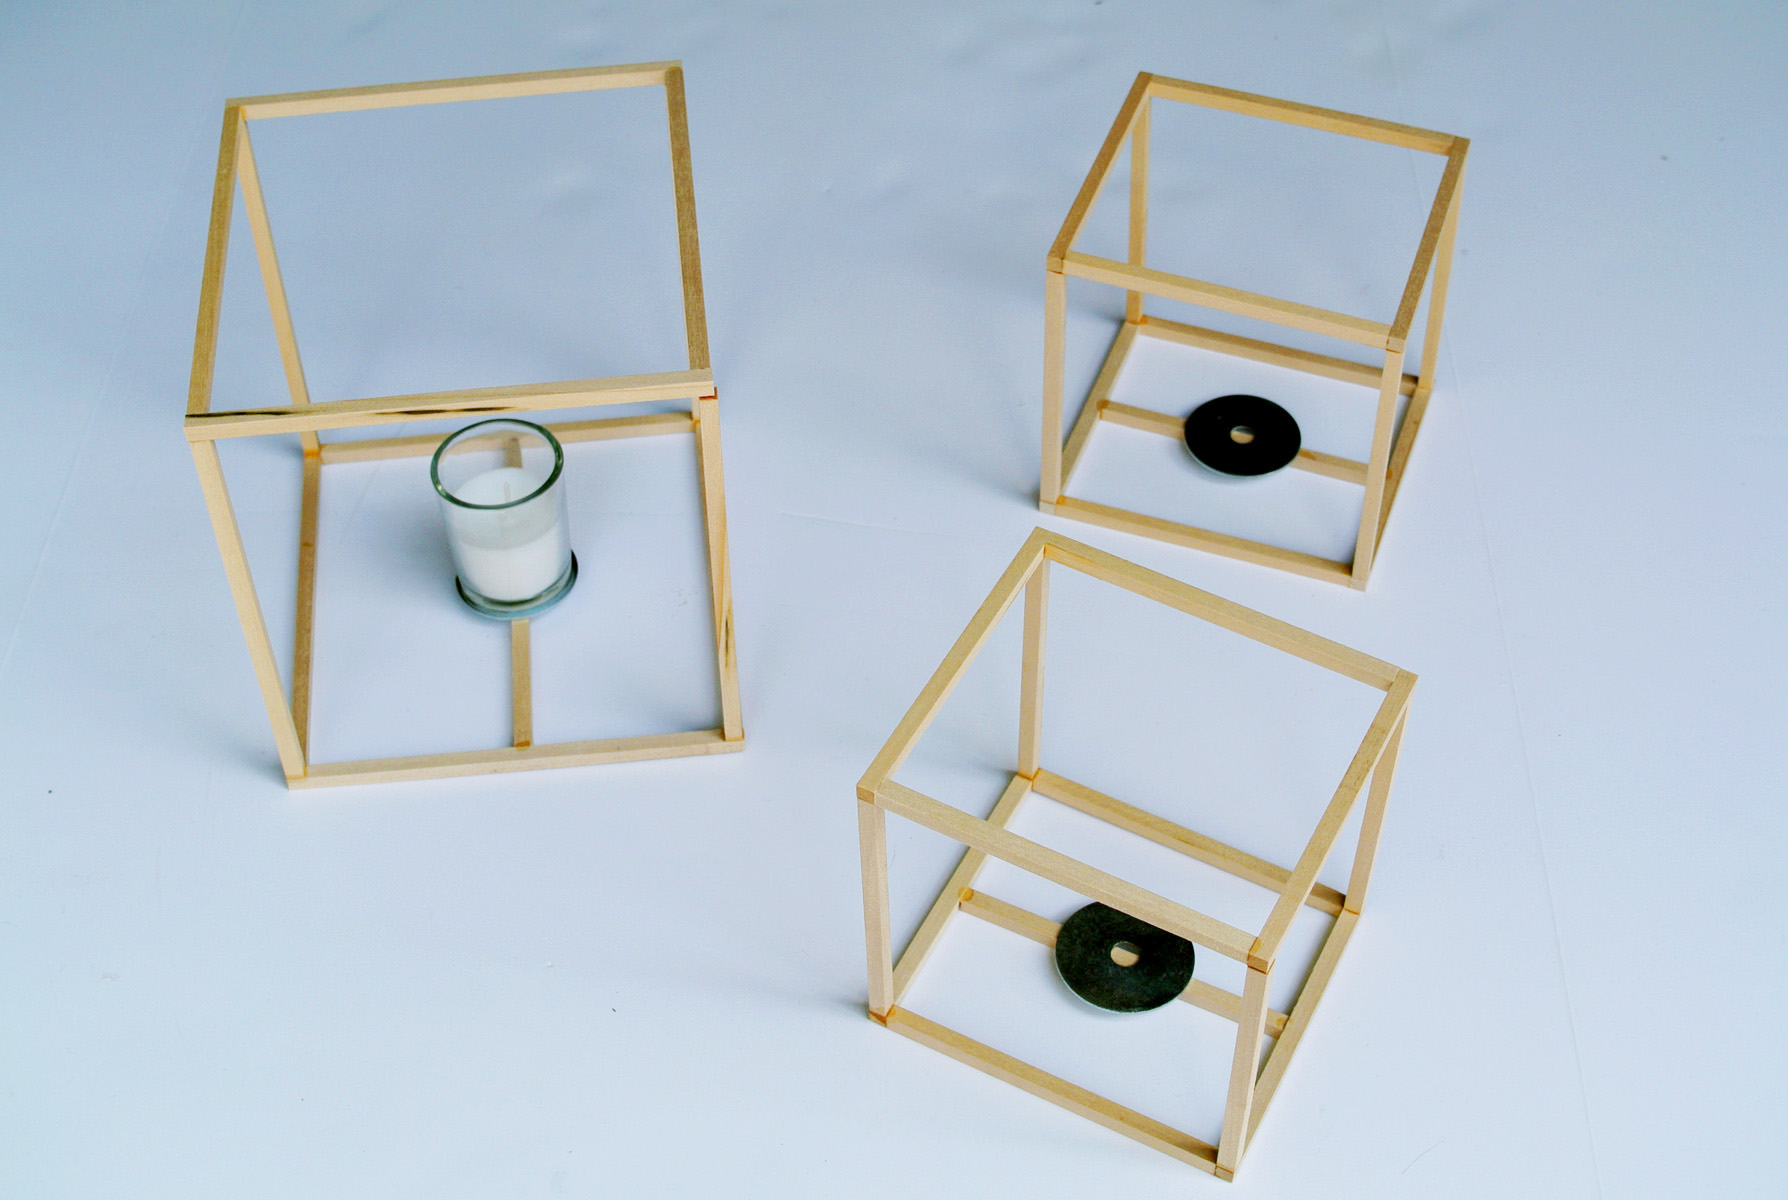
Step 3: Continue to glue and create a cube
Glue all the pieces together. Start with the top and bottom pieces. Gently dap a small drop of super glue to the ends of the dowel rods and hold together for approximately 15-30 seconds while drying. This is where the kicker accelerator will come in handy if you have it to speed up the drying process.
You can also dap a small amount of glue over the corner seams of each connection to ensure that the dowels stay well glued together. Create the top and bottom first and let dry. Once dry connect together in the cube shape with your 4 remaining dowels by attaching the cubes at the corners.
Once finished with the cube, glue the washer to the bottom of the cross-section dowel. This will be the most time-consuming part of the project but go slow and allow each of the attachments plenty of time to dry so that the project doesn’t fall apart later.
 View in gallery
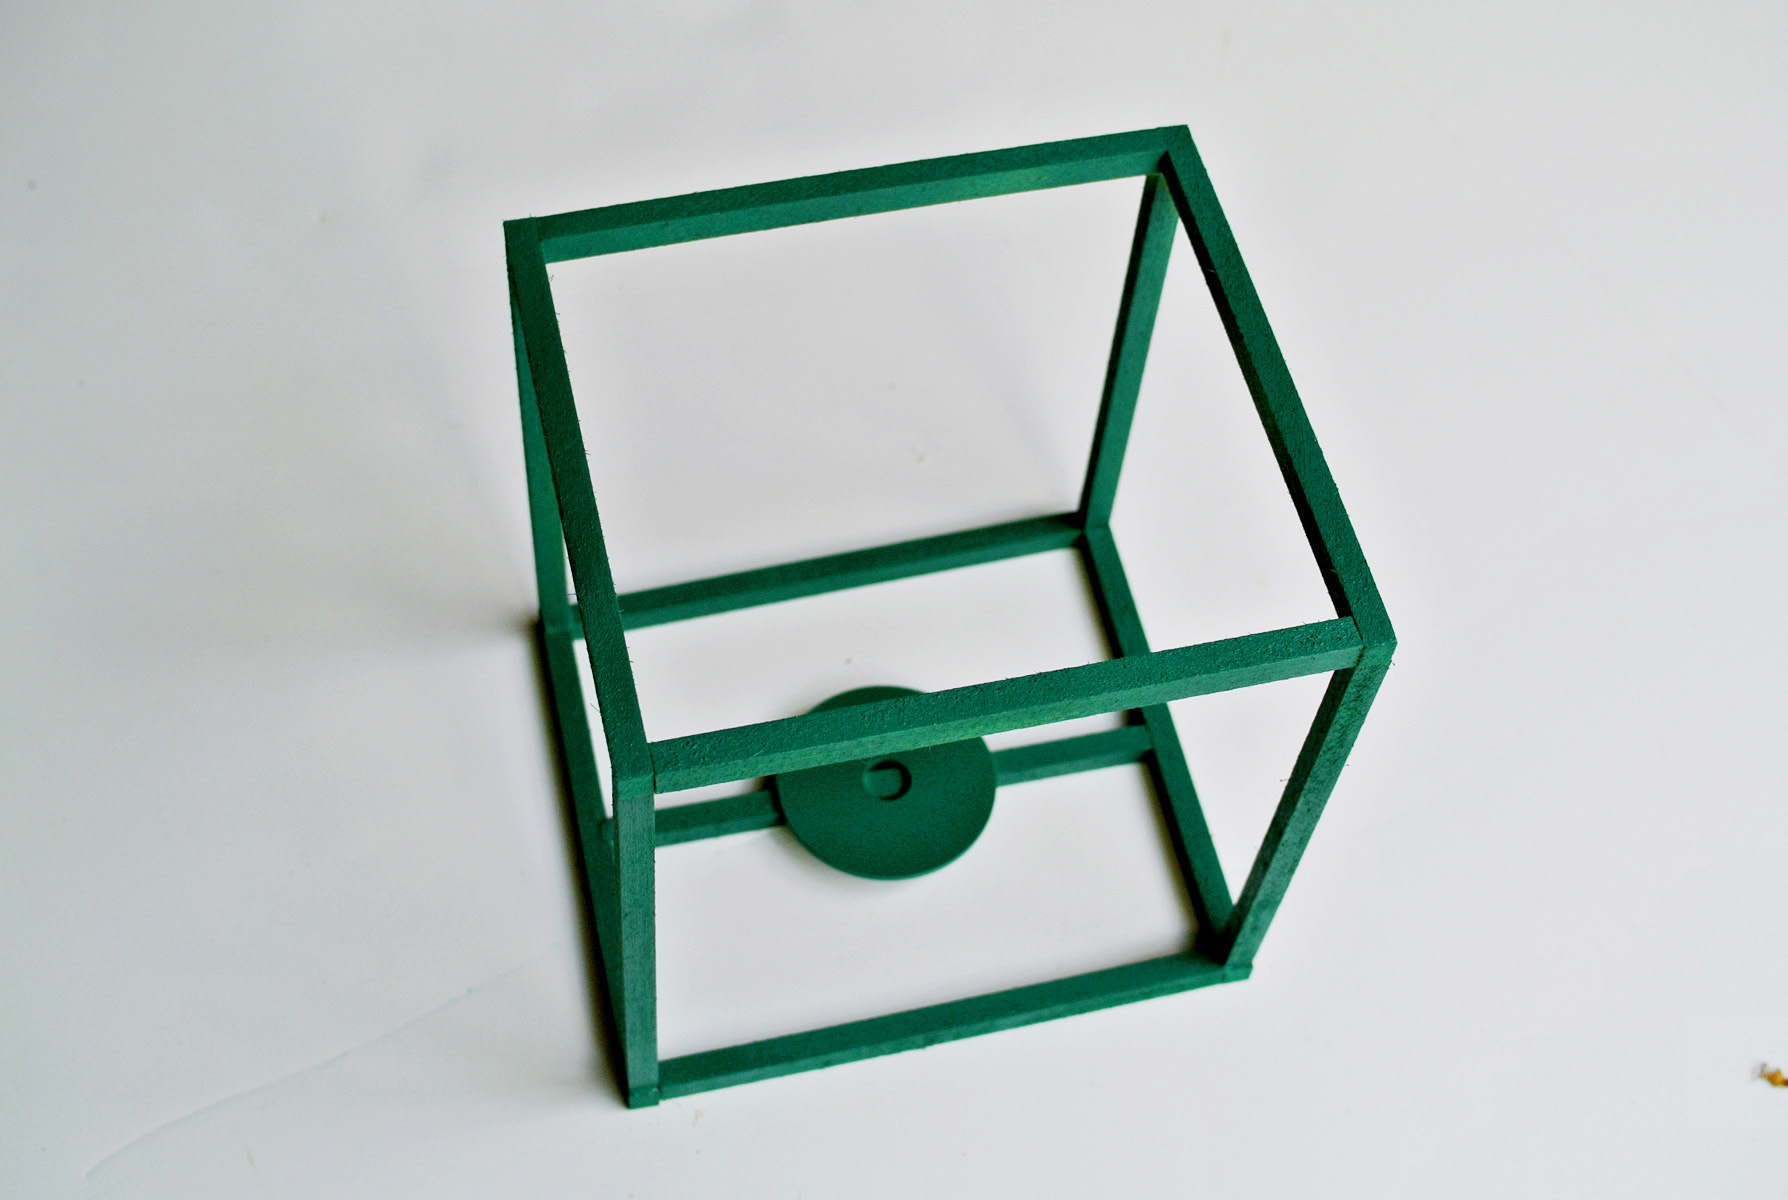
Step 5: Spray paint the cube
Lastly, once the cube is created and the pieces are all attached and completely dry, spray paint each of them a fun bright color! Make sure to flip over and get the underside of the cube.
 View in gallery
 View in gallery
Once the cubes are dry, your outdoorcandle holderis officially a completed lantern. So go ahead and place the votive candle in the center (make sure to use a candle already in glass or some sort of container) and enjoy your new accessory. Please note, these are made with wood so don’t leave the lit candles unattended and ensure that there is plenty of room between your flame and the sides of the cube.
 View in gallery
 View in gallery
 View in gallery
 View in gallery