迪Y Thanksgiving Tablecloth With Polka Dot Pattern
ThisThanksgiving tableclothwith the Polka dot project is extremely simple, straight-forward, and quick to do. At a time of the year when minutes and hours are at a premium, it doesn’t get much better than a fast迪Y project. Add some sparkle and personality to an existing tablecloth or create your own, and you’ll be ready for the big feast (or even tomorrow’s regular ol’ dinner) in no time at all.
 View in gallery
 View in gallery
迪Y Level:Thanksgiving tableclothfor Beginner
 View in gallery
Materials you’ll need to craft a Thanksgiving tablecloth:
- Linen cut to the size of your tablecloth (a good rule of thumb is a piece that is 2’ bigger than each tabletop measurement, so it hangs down 1’ on each side)
- Matching thread
- Gold acrylic paint (or in whatever color you want)
- Circle foam pouncers (1” size used for this example)
Step by step instruction to craft a tablecloth:
 View in gallery
首先列出了一大块纸板或a drop cloth on your work surface.
 View in gallery
Lay your fabric over the cardboard, lining up at least one corner of the fabric so you can work from one corner outward.
 View in gallery
Shake up your acrylic paint bottle, then pour a bit into a disposable plastic container’s lid.
 View in gallery
Grab your foam pouncer in the size that you want. A good rule of thumb is: the larger the piece of fabric, the larger the foam pouncer can be while still looking proportionate. Of course, if you want to make a statement by having an unexpected polka dot look, feel free to adjust the size of your pouncer and the “white space” between dots to however you want them.
 View in gallery
Lightly press your pouncer into the paint, making sure that the entire round foam face has paint on it, then press it gently onto your fabric.
 View in gallery
You should come away with a perfectly round polka dot! If it’s uneven, though, you can re-apply paint onto the pouncer and dab it onto the dot again. Try not to make the paint too thick or uneven with each polka dot.
 View in gallery
The reason we’ve laid out a protective surface underneath the fabric is because the paint can easily “bleed” through the fabric onto the work surface below, depending on the weave of your fabric. Linen tends to have a loose weave, so the bleed-through is definitely a factor.
 View in gallery
Continue this dabbing process until you’ve covered the protected section of your tablecloth. You might be able to get two to five polka dots out of each pouncer paint application, depending on the fabric and how much paint you’re getting onto the pouncer with each application.
 View in gallery
You can wait for the section of paint to dry, then move the tablecloth and do another section. I ended up moving mine to the floor on top of a paint drop cloth (which wasn’t possible at first, due to kids trafficking in and out). I finished the painting with the tablecloth on the floor.
 View in gallery
One tip I can offer is this: Of course, you will want to be extremely careful with each paint application onto your pouncer, but there may be a time when the paint drips or the pouncer slips out of your hand and lands on your tablecloth. Rather than try to wipe it out, I would recommend one of two things: (1) simply place another polka dot on top of the drip if possible, or (2) leave it alone. Wiping the paint off on a slim drip such as this would only spread it and make it much more visible. Another polka dot right here would also bring unnecessary attention to the mistake. It is hardly noticeable when left as-is. Allow paint to dry completely and thoroughly.
 View in gallery
Fold the edges in twice (once to fold the raw edge inward, the second time to hide the raw edge completely) and sew it all the way around the tablecloth.
 View in gallery
When you’ve sewn the edge of your tablecloth, you’re done!
 View in gallery
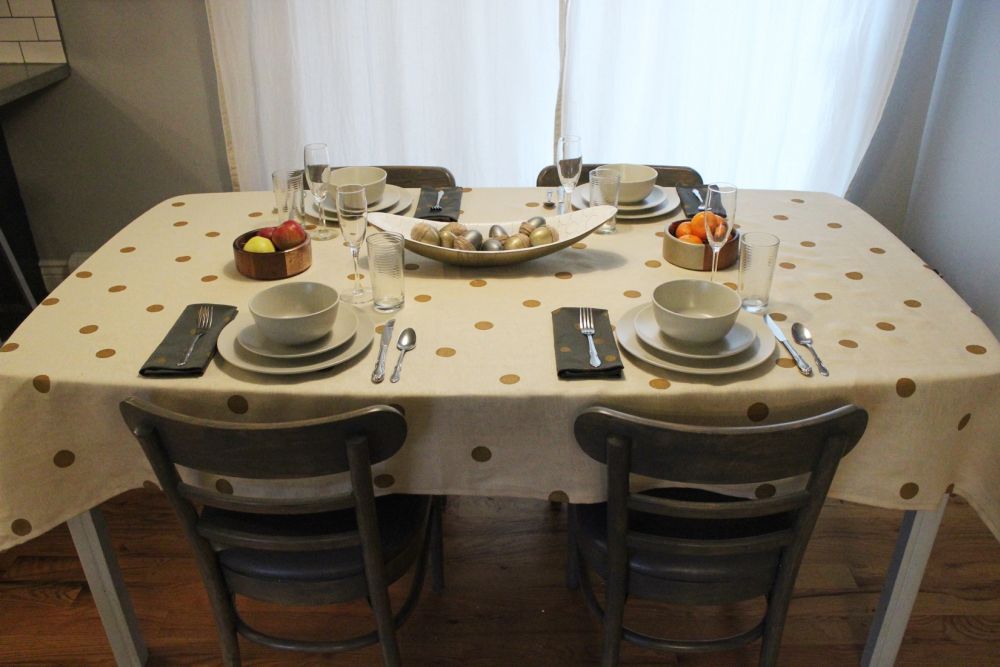
Set the table and see what you think. I especially like the cream linen + gold polka dot tablecloth paired with gold polka dot napkins in grey.
 View in gallery
Gold polka dots add such a touch of glam to even the simplest of table settings. That being said, I love the possibilities – black polka dots on a white tablecloth, white on black, multi-colored on cream, red and green on white, there are literally a million different options. You could even customize a special polka dot tablecloth for every holiday, if you wanted!
 View in gallery
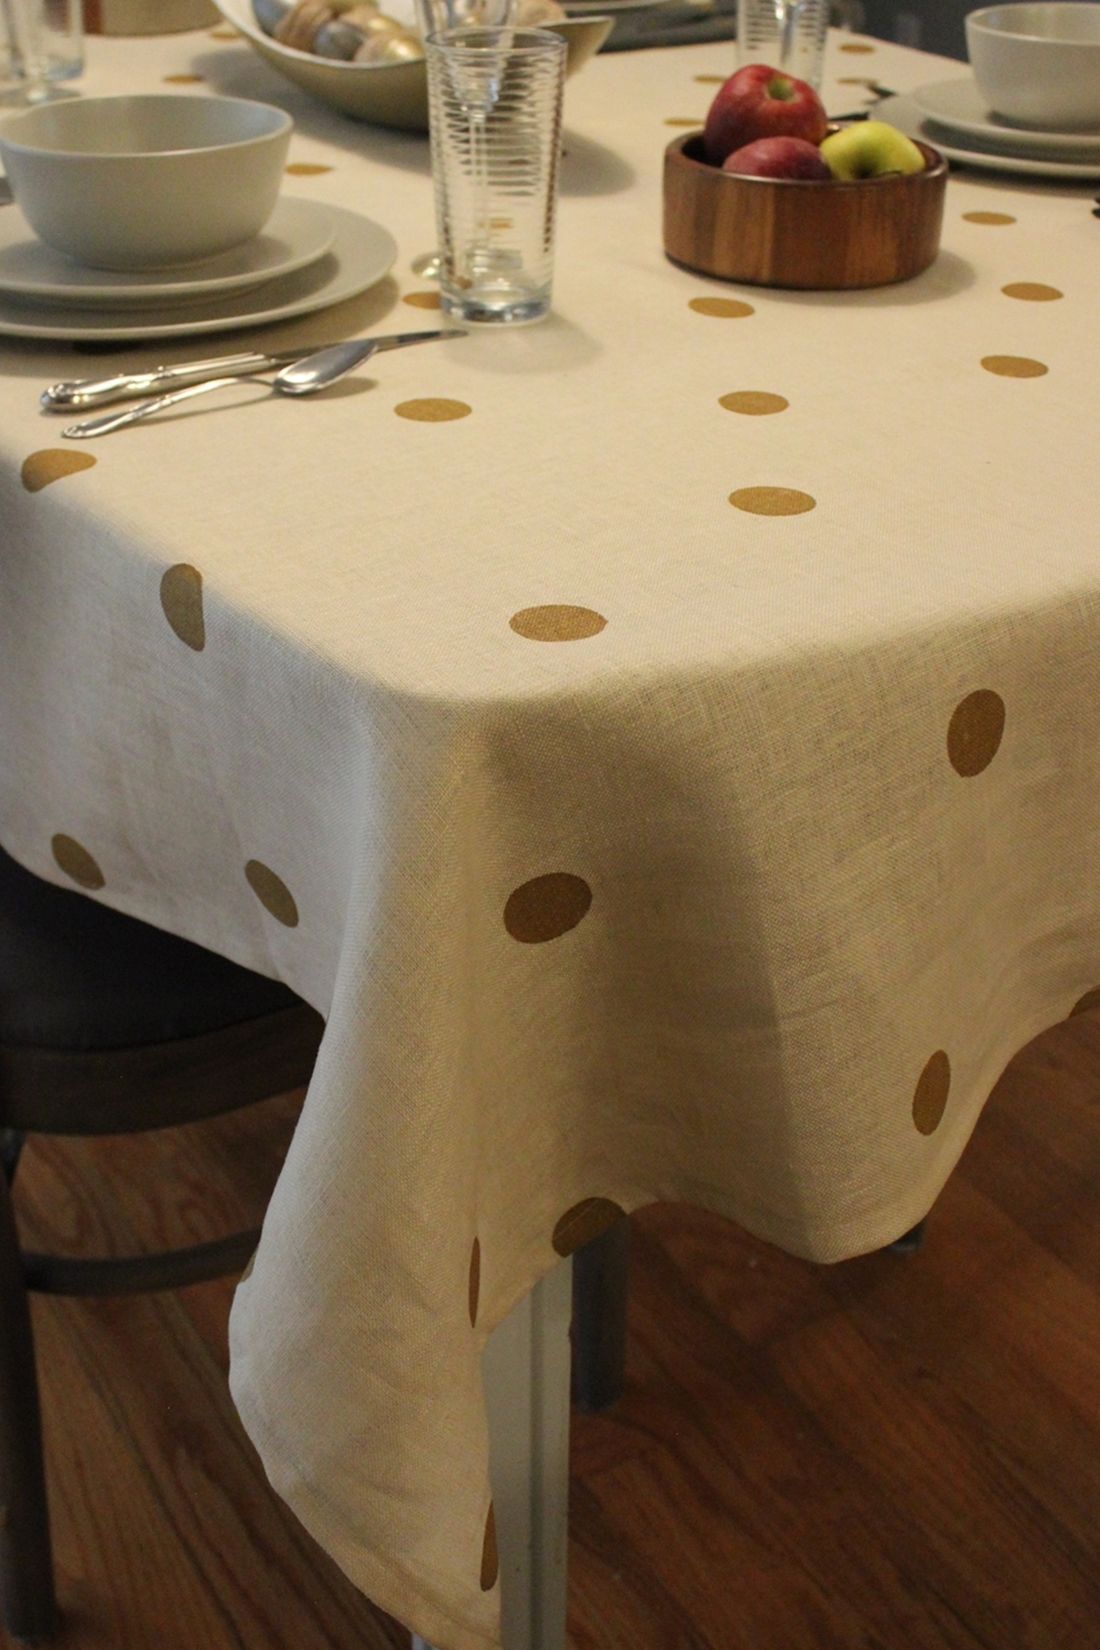
I think linen drapes so beautifully as a tablecloth. It’s not the friendliest of fabrics for messy meals, but it looks gorgeous!
 View in gallery
This table is set simply and sparsely right now, but it’s primed and ready to roll for a turkey day feast!
 View in gallery
When considering how much space to leave between your polka dots, remember that when the table is set, it will appear busier (visually) simply because there are more objects on the tablecloth itself. I would recommend erring on the side of sparseness.
 View in gallery
I hope you love your new DIY polka dot tablecloth for any occasion, including a memorableThanksgiving feast.