How to Frame a Modern Pergola
If you want to increase the outdoor value of your home, amodern pergola当然是这样做的一种方法。建造自己的凉棚可能会觉得像是一项艰巨的任务,事实是,它并不是快速或特别容易。但这肯定是可行的,而且很有意义。如果您想弄清楚如何计划或建造凉棚以使室外空间具有现代优势,那么本教程将带您了解如何构图。
 View in gallery
 View in gallery
这个特殊的凉棚包括6×6柱和壁挂式框架。目的是将凉棚框架圆从壁挂式框架的一端,两个柱子周围,然后返回壁挂式安装端的另一端。所有框架组件必须均为水平。
 View in gallery
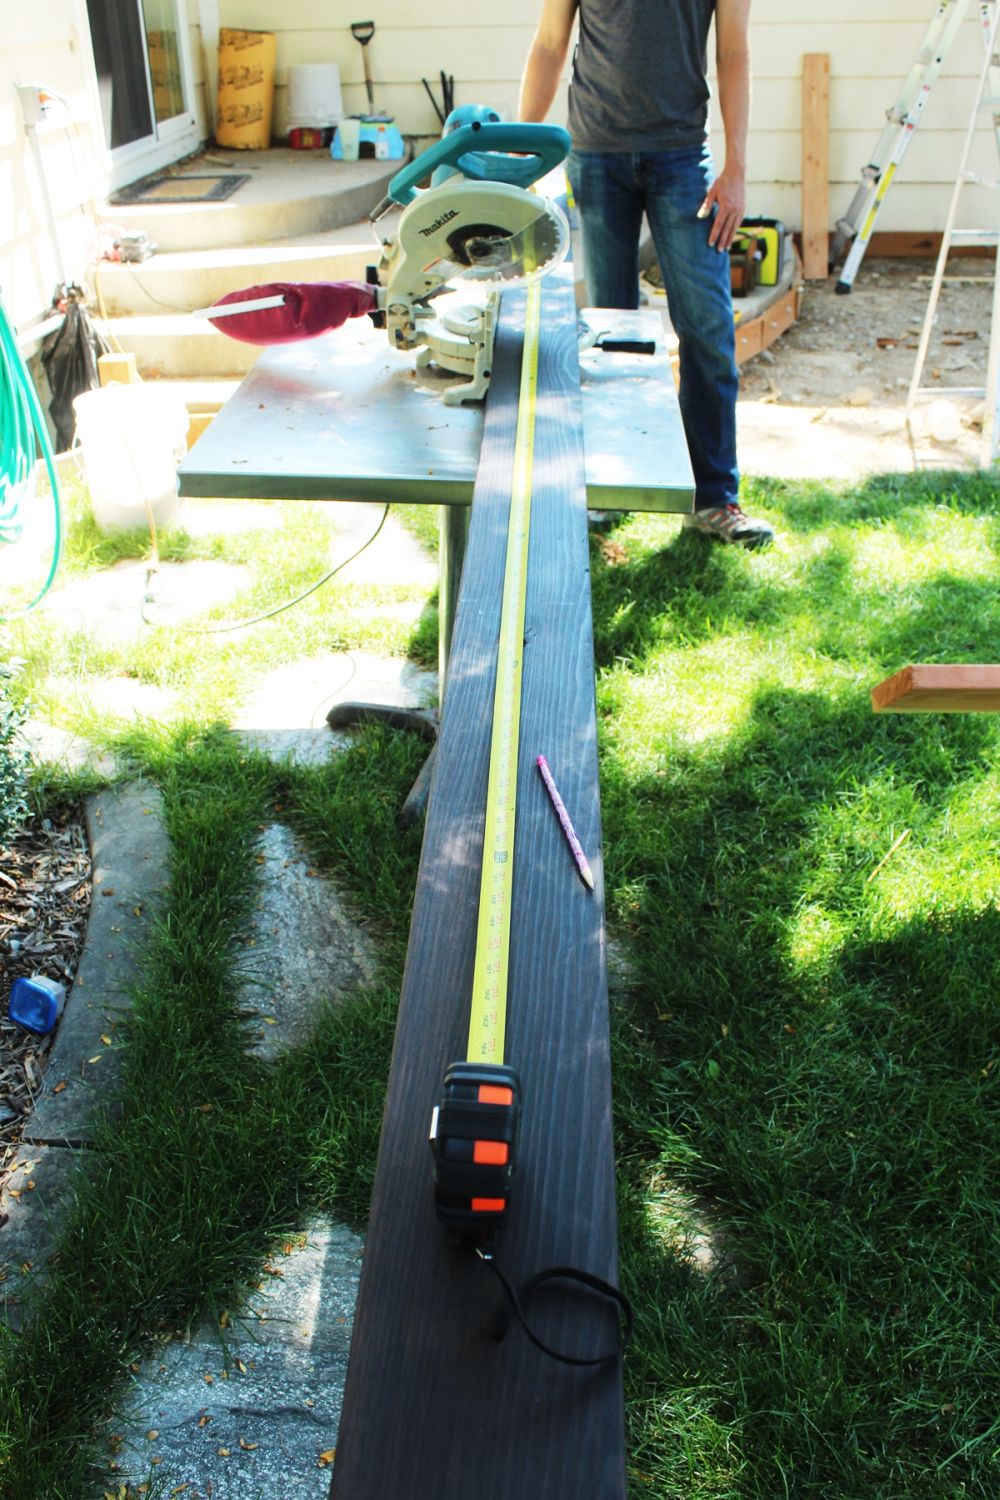
Start by finishing your redwood boards (e.g., staining, painting, and/or sealing) and allowing them to dry. This will make your life much easier if the finishing is done on the ground. Then measure from the wall of your wall-mounted frame cutout to the outside corner of your post. Mark this distance.
 View in gallery
The end next to the wall mount will be flat (e.g., 90-degrees, right angle), but the end of your pergola frame board that joins up with your pergola post will be a 45-degree mitered corner. Adjust your miter saw to cut at 45 degrees, then cut your lumber. Be sure to position the wood so that your cut extends outward from your measured distance. In other words, your measured distance should be the shorter side of the mitered corner cut.
View in gallery
Predrill for your 3-1/2” lag bolts. You may want to dry fit the mitered board upon on your wall mounted frame and pergola post to be able to mark the best place for lag bolts to be installed so that they don’t hit other bolts or so that they do hit the wall mounted frame boards themselves and not the gab in between the boards.
 View in gallery
Have a helper or two hold the board in place while you ratchet in the lag bolts with washers. (Don’t forget the washers!)
 View in gallery
不管什么爸爸rt of the pergola frame you’re installing, always check for level before and during installation. This includes installing lag bolts at any point. Don’t trust your eyes. Use a level constantly.
 View in gallery
Predrill for lag bolts, then ratchet in the lag bolts (plus washers) onto your pergola post near the mitered corner. Tip: Install one bolt completely, ensuring a level frame board, before you do the others. This will hold the frame board in place much more accurately and easily than a helper holding it for a long time while you try to do two or four lag bolt installations.
 View in gallery
Tip: If you’rebuilding a pergola and/or a deck,或任何涉及多个滞后螺栓的外部的东西,我们强烈建议您购买用于冲击驱动器或钻探的插座。该工具仅需40美元即可,将加快lag螺栓的速度速度,例如50。
 View in gallery
Just put the ratchet bit onto your power tool, and let the impact driver do the work. It’s so fast. (We’re sad we wasted half our morning with a hand ratcheting tool. This is definitely the way to go when building a pergola frame.)
 View in gallery
After the first board is installed, do the opposite board of your frame. Be sure to measure each distance individually to ensure square and level posts and pergola frame. Hopefully, your measurements are identical, but if they’re not, it’s better to cut one frame board a bit longer or shorter to fit a straight post than to force a leaning pergola post.
 View in gallery
The final component of your outer pergola frame is the floating board opposite the wall mount with two mitered corners. Measure from post corner to post corner, and use this measurement to mark the positions of the shorter sides of your 45-degree mitered cuts.
 View in gallery
始终偏向于滞后螺栓,使用垫圈并拧紧相对。借助凉棚框架的第三板安装,您还需要检查每个滞后螺栓位置,以免与已经安装在6×6凉棚柱中的滞后螺栓相撞。
 View in gallery
If you’re satisfied with this outer frame for your pergola, you can move on to installing the pergola slats.
 View in gallery
We decided that, for added stability and proportional aesthetics, we wanted to add in a second 2×6 layer to each side of this pergola frame. The wall mount frame already has two redwood 2x6s, so it makes sense that the rest of the frame would match.
 View in gallery
To do this, measure on the inside of the existing pergola frame, corner to corner.
 View in gallery
Cut your pre-stained 2×6 redwood lumber to that length, then measure and mark center. Mark 1-1/2” out from each side of center, as this is where your double beam will go. Tip: It’s easier, when possible, to measure and mark lumber when it’s down on the ground rather than up in the air.
 View in gallery
Measure outward from center the distance that you want your lag screws to hold the outer frame boards together. Because thewall-mounted pergola framelag screws are spaced 32” apart, we kept this same distance for the lag screws on the three other frame boards. Use a template to mark your two lag screw positions in relation to the sides of the board. (Example shows about 1” in from top and bottom sides.)
 View in gallery
(Full disclosure: Except flanking center, where we distanced the lag screws 8” out from either side of center so there would be greater support near the point where the center beam would fall. So, there’s a 16” space between the center two lag screw positions, and 32” spaces out from there. Do your math, so that your end lag screws end up between 2”-6” from the lumber’s ends.)
 View in gallery
Predrill all lag screw holes.
 View in gallery
Lift, then clamp your second frame board into place. You should clamp not only top and bottom, but also face to face.
 View in gallery
With the second frame board clamped in place on your installed pergola frame, predrill through your already-drilled holes into the existing frame board. Do this for all lag screw holes.
 View in gallery
Insert your 2-1/2” lag screws (don’t forget the washers) into the holes, and ratchet them in. I can’t recommend a drill-based ratcheting set enough for a project like this. It saves so much time and arm cramping.
 View in gallery
When the first lag screw of the set is in, you can remove the face-to-face clamp if you need more space for your drilling hand. Otherwise, keep the clamps in place.
 View in gallery
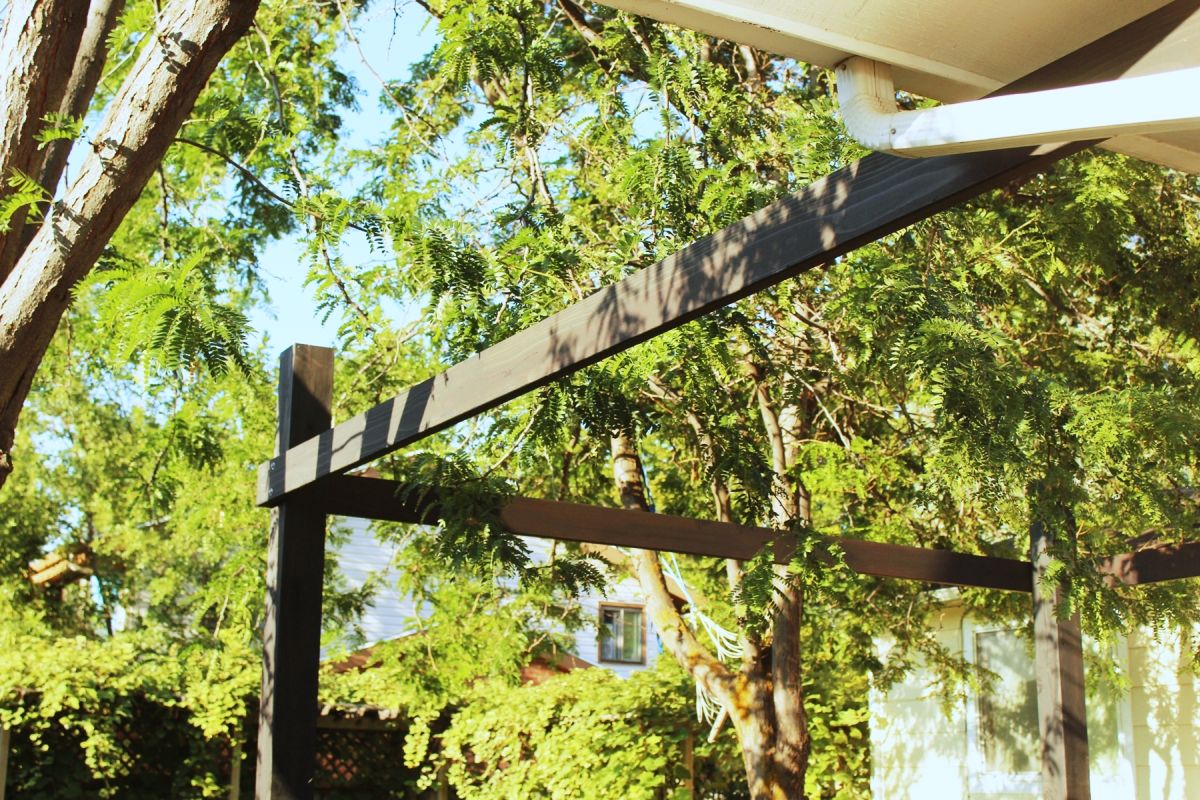
This is what your doubled-up pergola frame will look like. It’s stronger, sturdier, and looks better. That’s apergola design三,如果有一个。
 View in gallery
Repeat this process for the other two pergola frame sides. One of the sides doesn’t need the center beam considerations and markings, because the beam will only be running one way (perpendicular to the direction your pergola slats will run) and, therefore, only connecting to two of the four pergola frame sides.
 View in gallery
A solid doubled-up pergola frame perimeter looks much more balanced than having a single 2×6 pergola frame on three of the sides.
 View in gallery
It will be much more secure, too, for bearing the weight of the pergola slats.
 View in gallery
如果你发现你的绿廊架板不一致vertically as well as you’d like (redwood, like all wood, doesn’t necessarily come perfectly straight all the way down each board), here is a simple trick to force the wood to align. In this case, the tops and bottoms of the frame boards would not line up, even when we tried clamping them. In this case, take two short scraps of 2×4 or 2×6 or whatever you have handy, and hold them against the top and bottom of your lumber pieces that need aligning. Clamp these boards into place, and you will see the lumber align easily. Essentially, this broadens the face of the clamps and provides much more leveling force than just the 1” or 2” clamp face. Even with this method, though, you’ll need to clamp the boards face-to-face as well.
 View in gallery
This is what the inside corners of your pergola frame will look like, with the two secondary frame boards abutting the pergola posts.
 View in gallery
This is a good illustration of proportion. You can decide for yourself if you think the second 2×6 is worth it. For us, it is absolutely worth it.
 View in gallery
Now that the pergola frame perimeter is installed, it’s time to tackle the center beam. This is pretty simple and straightforward, actually.
 View in gallery
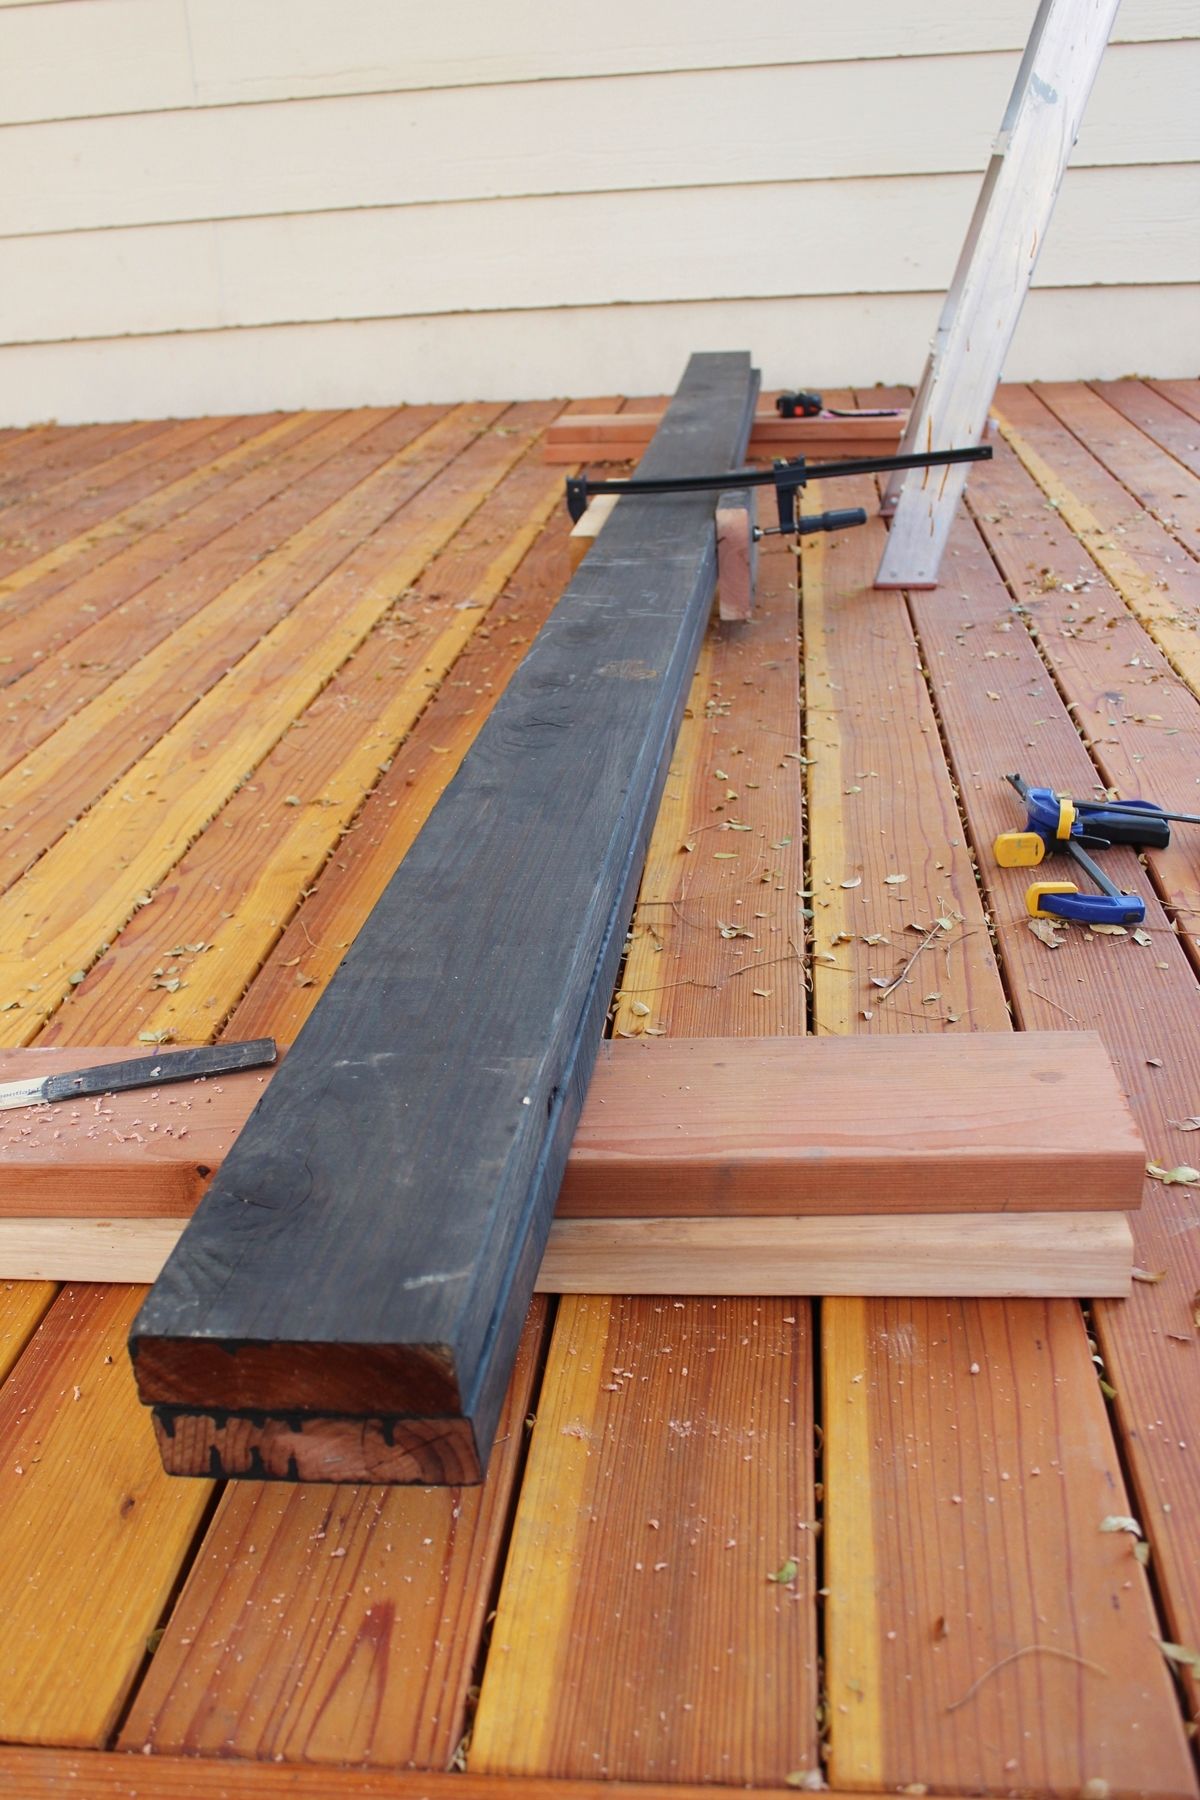
Measure the distance between your two center marks on the interior pergola frame boards. Cut two pre-stained 2×6 boards to this length, and lay them on top of each other. We want to screw these two boards together to create one beam before mounting them to the pergola frame.
 View in gallery
You might notice that, again, parts of the two boards don’t necessarily align. The ends of these boards were about 1” off from each other.
 View in gallery
Again, to remedy this, take two scrap pieces of wood and set them on the ends that need aligning. Clamp into place.
 View in gallery
You can see here that the ends are now perfectly aligned and ready to be screwed together so they stay in place. Wood is very forgiving that way – it can often be bent or torqued to meet your needs, as long as you know how to do it.
 View in gallery
At this point, with your center beam boards clamped together, you’ll want to determine your pergola slat spacing. This is because we’ll be screwing the beam boards together, but we don’t want to install screws right at the point you want your slats to mount to the beam. Lay out some scrap wood to get an idea of your preferred spacing. This example will use 10” slat spacing, center to center.
 View in gallery
Starting at the center point, measure 10” out toward the ends. You will need to do your math to determine if you want the slats to flank center (in which case you’d mark 5” out from the center point in each direction) or if you want a center slat. You’ll want the end slats to fall roughly the same distance from the pergola frame boards as the rest of your slat spaces.
 View in gallery
When your slat positions are marked, predrill two screw holes into every other space between the slat marks.
 View in gallery
Install exterior wood screws into your predrilled holes.
 View in gallery
Then flip the beam over and predrill two screw holes into every other space on that side. These should leapfrog the screws on the other side so that each space has just two screws, either from side A or side B of the beam (as opposed to having four screws in one space and zero screws in the next space).
 View in gallery
Take out your HD kreg jig and drill two pocket holes onto each end of your beam. Be sure to clamp the jig into place and hold it securely while drilling (not shown).
 View in gallery
提示:将两个孔靠近梁的一侧靠近……
 View in gallery
…and place the two holes closer to the board sides on the other side of the beam. This will help keep the pocket screw tips from running into each other.
 View in gallery
Have a helper (or two, or three) hold the beam squarely in place, based upon your 1-1/2” out-from-center markings on the pergola frame that you made in the beginning. Install your HD pocket screws, two per side (so, four per end) of the beam. Then repeat for the other end of the beam on the other pergola frame perimeter board.
 View in gallery
而且,就像那样(哈哈),你就完成了!安装了您的凉棚框架,准备好完成安装凉棚板的结束。
 View in gallery
We love the uniformity of the lag screw placement all the way around the凉棚框的内部. These will be painted matte black in the near future, but for now it helps to see where they are. Even the shortened screw spacing flanking the center beam looks consistent.
 View in gallery
我们也将触摸口袋洞stain to help protect and preserve the wood. Our opinion is that it’s much easier to do stain touchups with the boards installed than it is to stain the entire boards after installation.