DIY Rustic Wooden Cake Stand
Create a prettycake or cupcake wooden standthat is perfect for parties and social gatherings! This rustic wood slice stand is easy to make and you can customize it with any color you like. If you love mason jars and country chic styling then you’ll love this project!
 View in gallery
 View in gallery
Supplies Used to make a Rustic Wood Slice Cake Stand:
- Thick Wood Round (at least 4-5 inches tall)
- Thin wood rounds (less than one inch thick and 3-4 inch diameter)
- Staple Gun
- Wood Glue
- Pickling Paint
- Wood Sealer (low gloss)
Step by step process to build a wooden cake stand:
Step one:Arrange seven wood slices as pictured. Start with one wood slice in the center, then arrange the other six circles around the center wood slice.
 View in gallery
第二步:Use a staple gun to connect the wood slices together. Staple along all the edges where slices meet.
 View in gallery
 View in gallery
Step three:Add six slices to the edges of the large circle you created in step one. Use wood glue to add the end piece circles tothe cake stand top.
 View in gallery
 View in gallery
Step four:Glue the base to the circle. Leave the entire project upside down, as pictured, and let the glue dry for several hours.
 View in gallery
Step five:Flip the cake stand so it is right side up. Add a wash of color to the wood slices with Pickling Paint. Brush the color on and let it dry. I used a wash instead of craft paint because I wanted the wood grain to show through. Let the paint dry.
 View in gallery
Step six:沙画的表面lightly, and wipe off the dust. Seal the project by painting on a clear protective varnish that is also food safe.
 View in gallery
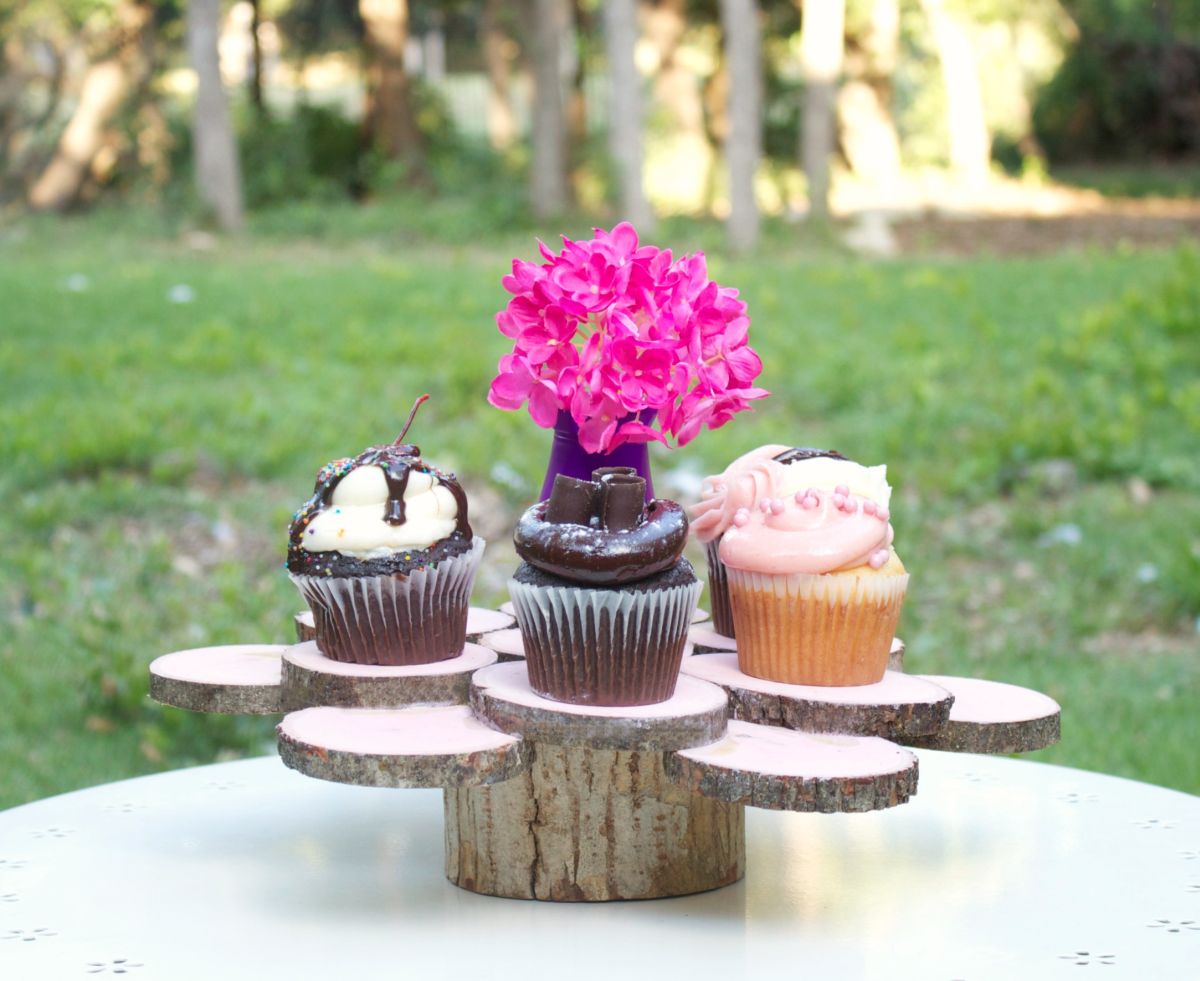
This rustic wood slice cake stand is perfect for outdoor parties. I love the natural look of the wood slices, and it creates a pretty and unexpected piece of table decor for your gatherings.
 View in gallery